Western Saddle Pad Design Guide: Patterns, Tooling, Beadwork and Colorways for Private-Label Buyers
Published · Cornovo Saddlery
Consider a common scenario: a buyer approves a striking western pad design from a digital proof, and the bulk shipment arrives with the pattern shrunk to the wrong scale, the tooling shallower than expected, and the colors off from what retail ordered. Every one of those surprises was preventable — not with a better designer, but with a better design brief. In western tack, design is the brand, and the brief is what protects it.
In short: design the pad as four coordinated layers (blanket-top pattern, wear-guard tooling, edge binding, applied decoration), choose each element for the tier and customer the pad serves, plan colors in coordinated families rather than one-offs, and lock everything with a physical strike-off sample before bulk cutting. Standard program terms: MOQ 50 pieces per color. This guide walks private-label buyers, equestrian brands, and distributors through each layer and how to brief a factory so the design approved is the design that ships.
Key takeaways
- Western pad design has four layers: blanket-top pattern, wear-guard tooling, edge binding and piping, and applied decoration (beadwork, embroidery, conchos).
- Tooled leather wear guards signal tier — choose the tooling level (plain, stamped, hand-tooled) for the pad’s price position and quote tooling as a separate line item.
- Woven, printed, and traditional wool blanket tops each suit different priorities: durability and texture vs trend speed vs heritage story — match the method to the goal.
- Every decorative element adds a QC checkpoint: beadwork attachment, embroidery stitch density, and concho rivets all need pull tests.
- Lock the design with a physical strike-off sample, not just a digital proof — pattern scale and color look different at full size.
What are the design layers of a western saddle pad?
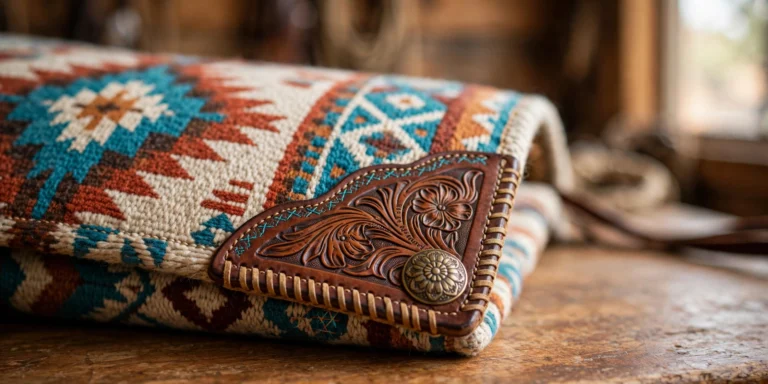
A western pad is four stacked design decisions: the blanket-top pattern (what buyers see first), wear-guard tooling (where tier is announced), edge binding and piping (the frame), and applied decoration (beadwork, embroidery, conchos). Decide the pad’s cost tier and positioning before designing, because that choice controls which layers are even available:
- Blanket-top pattern: the woven or printed pattern on the pad’s visible top layer — southwestern geometrics, serape stripes, florals, Aztec-inspired motifs. This is the first thing the buyer sees and the primary differentiator.
- Wear guards: the leather (or synthetic leather) panels at the front and rear where the saddle and cinch rub. Plain, stamped, or hand-tooled — the wear guard is where premium pads announce themselves.
- Edge binding and piping: the border treatment around the pad’s perimeter. Contrasting binding color, whipstitch lacing, or piped edges frame the design and add perceived value for little added cost.
- Applied decoration: beadwork, embroidery, conchos, fringe, or crystal accents applied to the wear guards or blanket top. Highest visual impact, highest cost, highest QC risk — use deliberately.
Which layers you execute depends on the pad’s cost target and positioning: value lines commonly execute layers 1 and 3 well; mid lines add stamped wear guards; premium lines execute all four. Decide the tier before designing — it controls which elements are even available at the target cost. One layer that crosses all tiers is the front profile: the pad’s wither shape should suit the horses it serves (contoured fronts clear the withers on most builds; cutout and cutback profiles give more relief for high-withered horses — see the Riding Warehouse western pad guide for how each shape fits).
How do blanket-top patterns work in production?
Three production methods serve different goals: woven jacquard (pattern woven in — structural, durable, higher cost), printed (unlimited colors and detail, fastest trend response), and traditional wool blanket tops (heritage look, natural fiber story). Match the method to the line’s priority — texture and durability, trend speed, or heritage — not to a fixed ranking:
| Method | How it works | Where it typically fits | Watch out for |
|---|---|---|---|
| Woven jacquard | Pattern woven into the fabric on a loom | Lines where durability and texture carry the brand — the pattern can’t fade or crack because it’s structural | Higher cost; longer pattern development |
| Printed | Pattern printed onto base fabric | Fast trend response and photographic detail — unlimited colors, flat surface | Colorfastness needs checking, especially dark prints on light grounds |
| Traditional wool blanket top | Woven wool with classic patterns | Heritage-look lines and natural-fiber storytelling | Fiber content and care requirements vary — confirm the actual composition |
There is no universally best method — only the method that fits the goal. Woven patterns suit brands prioritizing wear and texture; printed tops suit buyers chasing trends quickly; many successful lines run both, with woven core patterns and printed seasonal accents. For any method, confirm the fabric composition and run a colorfastness check on the riskiest color combination before bulk.
What should buyers know about tooled wear guards?
The wear guard is the leather panel at the pad’s front (and often rear) that takes cinch and saddle wear. Its tooling level should match the pad’s price position: plain for value lines where the pattern carries the design, stamped for mid lines, and hand-tooled for premium — always on a leather substrate thick enough to hold the tooling:
- Plain: untooled leather, sometimes with a stamped border. Clean, modern, budget-friendly — the right call when the blanket-top pattern carries the design.
- Stamped: machine-pressed pattern (basketweave, floral stamps). Consistent, affordable, and looks sharp at retail distance.
- Hand-tooled: carved and stamped by hand. Each piece slightly unique, visibly deeper and more detailed. In our supplier experience, hand tooling is typically the single most expensive design step on a pad — quote it as a separate line item so you can value-engineer (for example, hand-tooled front guard, stamped rear) without redesigning.
Spec the leather too: top-grain vs split, thickness in millimeters (confirm per quote — private-label wear guards commonly run around 2–3mm, but state it as a spec), and edge finishing (burnished, painted, or raw). A hand-tooled design on thin split leather is a mismatch — the tooling deserves a substrate that holds it. Ask the factory for a leather swatch card with your strike-off so you approve the actual substrate, not just the design.
How do beadwork, embroidery and conchos affect cost and QC?
Applied decoration adds the show-ring drama — and the cost, QC risk, and lead time. Specify bead material and attachment (sewn, not glued), embroidery stitch density for the actual fabric, and concho rivet setting and finish. Then add a pull test for every decorative element, because loose beads and rotating conchos are top complaints:
- Beadwork: glass or acrylic beads sewn in patterns, often on wear guards. Specify bead material (glass outlasts acrylic in our experience), attachment method (sewn, not glued, for anything that will see sweat and sun), and add a pull test to QC — loose beads are a top complaint.
- Embroidery: brand logos, initials, or decorative motifs. Stitch density controls both look and durability; low-density embroidery on a high-abrasion area will not survive a season in our experience. Digitizing quality matters more than machine speed — confirm the stitch count and density with the digitizer for the actual fabric.
- Conchos: decorative metal discs riveted to wear guards. Check rivet setting (they should not rotate or pull free), metal finish (nickel, antique brass, copper are the common standards), and that concho backs don’t create pressure points against the horse.
Rule of thumb: each decorative element should earn its place by either carrying the brand (logo embroidery, signature concho) or carrying the price point (beadwork that justifies premium). Decoration for its own sake adds cost, QC risk, and lead time without a merchandising story.
How should private-label buyers plan colorways?
Plan in colorway families — one pattern executed in 3–5 coordinated color stories — rather than one-off colors. A southwestern geometric in turquoise/rust, burgundy/tan, and black/grey is one pattern, three SKUs, one merchandising family. Families win because retailers build display walls from one pattern and restock one family, not scattered singles:
- Retailers can build a display wall from one pattern instead of hunting across patterns.
- Riders who love the pattern but not the color have alternatives — you keep the sale.
- Reorders are simpler: restock the family, not a scattered set of singles.
- Marketing photography multiplies: one shoot, three color stories.
Anchor each family with one neutral-adjacent colorway (black, brown, natural) that sells year-round, plus fashion colors that rotate. And keep a record of dye-lot standards per colorway — reorders months later must match, or your retailer’s display wall falls apart. State an acceptable tolerance (for example, a defined Delta E range or visual match under standard lighting) and require the factory to match against the sealed reference standard on every reorder, not against the previous bulk lot — colors drift lot to lot if each run matches the last.
How do you brief a factory on a custom design?
The brief that prevents expensive surprises has five parts: reference artwork (vector files, never a phone photo), full-scale pattern measurements, Pantone color standards plus a physical swatch, a placement map showing exactly where each element goes, and the construction spec underneath. Get all five confirmed before anything is cut:
- Reference artwork: vector files (AI/EPS) for logos and motifs; high-resolution images for patterns. Never brief from a phone photo of another brand’s pad.
- Pattern scale: state motif size in centimeters at full scale. A pattern that looks right on screen can look lost or overwhelming on a full-size pad — request a full-size paper print to check scale before cutting fabric.
- Color standards: Pantone references for every color, plus a physical standard (fabric swatch or prior production) for the factory to match against.
- Placement map: a flat sketch showing exactly where each element goes — wear guard shape and size, embroidery position and size, binding color per edge.
- Construction spec: fill type and thickness, backing material, binding width — the design brief rides on top of the construction spec from your tech pack.
Then lock it with a physical strike-off: one full pad built to the brief for your approval before bulk cutting. Digital proofs lie about scale, texture, and color. The strike-off is the contract — bulk production is judged against it, not against the email thread. Confirm the strike-off timing when you request the quote, since it adds steps (artwork approval, revisions) that a repeat order doesn’t have.
What specs should I confirm when requesting a quote?
- Pattern method (woven / printed / wool blanket top) and the fabric composition behind it
- Wear-guard tooling level (plain / stamped / hand-tooled) quoted as a separate line item
- Leather spec for wear guards: grain, thickness in mm, edge finishing
- Applied decoration: bead material and attachment method, embroidery stitch density, concho finish and rivet spec
- Colorway families: Pantone references per colorway plus dye-lot tolerance for reorders
- Strike-off terms: one physical sample for approval before bulk, and the timing for it
- MOQ per color (our custom programs run at 50 pieces per color) and whether colorway families can be split across one order
Frequently asked questions
How much does custom tooling add to the unit cost?
It depends on coverage and method — ask the factory to quote tooling as a separate line item so you can compare plain vs stamped vs hand-tooled on the same pad. In our supplier experience, hand tooling is typically the largest single design-cost step, which is why many programs mix levels (for example, hand-tooled front guard, stamped rear) to hold the price position.
Can I trademark my pad pattern?
Original patterns can be protected, but consult an IP attorney in your market — and make sure your original pattern isn’t a close copy of an existing design, which is a common pitfall with southwestern and tribal motifs. Put design ownership in writing with the factory: who owns the artwork, the tooling dies, and the embroidery digitizing files.
How do I keep reorders color-consistent?
Keep sealed reference standards (the approved strike-off plus Pantone-matched swatches) and require the factory to match against them on every reorder, not against the previous bulk lot — colors drift lot to lot if each run matches the last. State an acceptable tolerance (for example, a defined Delta E range or visual match under standard lighting).
Is beadwork durable enough for daily riding pads?
Sewn beadwork on wear guards holds up reasonably; beadwork on the blanket top’s flex zones does not. Position decoration where abrasion is lowest, specify sewn (not glued) attachment, and add bead pull tests to your QC plan. For hard-use ranch pads, embroidery outlasts beadwork in our experience.
What is the typical lead time for a custom-designed pad?
Longer than a stock-color order: artwork approval, strike-off production, revisions, then standard bulk production. Confirm the strike-off timing and the full production window in your quotation before promising retail delivery dates — don’t promise until the strike-off is approved.
Sources & Further Reading
- How to Choose the Best Western Saddle Pad (Riding Warehouse): wither profiles (contour, straight, cutout, cutback) and pad shapes that set the design’s fit layer.
- The Science of Western Saddle Pads (Team Roping Journal): how contoured pads distribute pressure — the fit logic behind the front profile.
- Custom branding: embroidery and logo options for saddle pads (internal): stitch-density and placement detail for the embroidery layer.
- Saddle pad binding and edge finishing buyers guide (internal): the binding layer’s construction options.
- Contoured vs straight saddle pads (internal): how pad shape interacts with horse conformation.
- Seasonal color drops for private-label saddle pads (internal): launching the fashion colorways in each family.
- How to brief a factory on custom saddle pads (internal): the full tech-pack brief this design brief rides on.
Designing a private-label western line? Send us your pattern direction, wear-guard preferences, and target tier — MOQ 50 pieces per color — and we will return a strike-off plan with leather swatches and a line-item quotation. Start your design inquiry today.
