
Saddle Pad Straps Explained: Girth Straps, Billet Straps and Keepers for Distributors
Published · Cornovo Saddlery
Consider a common scenario: a distributor receives a container of dressage pads that look perfect in the product photos — until customers try them. The girth straps were sewn too far forward, so every pad crept backward under saddle. Returns arrived for a defect invisible in the photos and missing from the QC checklist, because nobody had specced the strap positions on the tech pack.
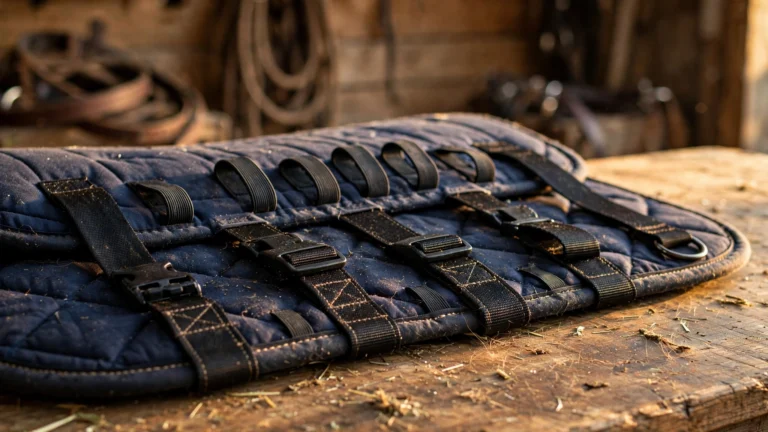
There are three saddle pad strap systems: girth straps (the girth threads through sewn loops), billet straps (the saddle’s billets thread through slotted straps), and Velcro keepers (tabs that wrap the billets). Match the system to the discipline your customers ride in, dimension strap positions on the tech pack per size, and inspect the attachment stitching pre-shipment.
For distributors, straps are the smallest line item on a saddle pad tech pack and one of the largest sources of fit complaints. Girth straps, billet straps, and keepers decide whether a pad stays put under a working saddle — and buyers who spec them precisely see fewer returns than buyers who leave them to factory standard. This guide covers each strap type, how they’re attached, and what to put on the purchase order.
Key takeaways
- Saddle pads use three strap systems: girth straps (girth passes through), billet straps (billets thread through), and keepers/Velcro tabs (grip the billets) — each suits different disciplines and price points.
- Strap position matters more than strap material: misplaced straps cause pad creep, the most common strap-related return in our experience.
- Spec strap length, width, attachment method, and position measurements on the tech pack — factory standard is where fit complaints are born.
- QC straps separately from the pad body: stitch density at attachment points, Velcro engagement on keepers, and webbing edge finishing are the failure points to check.
- In our experience, keepers are among the lowest-cost anti-slip upgrades on a schooling pad and a useful private-label differentiator at the value end.
What are the three saddle pad strap systems?
Every English pad on the market uses one of three strap systems, or a combination of two. The differences are mechanical: which part of the tack the strap engages, and how much sewing labor the system needs. Here is the comparison.
| System | How it works | Common on | Relative cost (supplier experience) |
|---|---|---|---|
| Girth straps | Fabric loops sewn under the pad; the girth threads through them | All-purpose, jumping, dressage pads | Typically the lowest added cost — simple sewn loops |
| Billet straps | Narrow straps with holes or slots; saddle billets thread through | Dressage pads, high-end all-purpose | The most labor-intensive of the three — cut, finished, and positioned precisely |
| Keepers / Velcro tabs | Short tabs with hook-and-loop that wrap the billets | Schooling pads, value lines, half pads | Typically low — quick to sew |
Many pads combine systems: girth straps plus Velcro keepers is the common schooling-pad formula, giving two anti-slip mechanisms for little extra cost. Premium dressage pads often use billet straps alone, positioned for the longer dressage billet. Western pads typically skip straps entirely — the cinch and the pad’s own weight and contour hold it — which is one reason Western pad QC focuses on spine and contour rather than strap placement (see our western saddle pad design guide for how those pads are specced instead).
Why does strap position matter more than strap material?
A pad creeps when the forces on it are unbalanced, and strap position sets that balance. Girth straps sewn too far forward let the pad slide back; too far back and the pad bunches at the withers. Billet straps that don’t align with the saddle’s billet positions twist the pad sideways under load. Webbing grade rarely causes these failures — placement does.
The fix is measurement, not material. On the tech pack, spec the strap center positions as distances from fixed reference points — commonly from the front edge of the pad and from the spine centerline — per size. A factory working to standard position will place straps where its last customer’s pattern put them, which may not match your saddle fit.
Set position tolerances in writing as a starting spec: ±1 cm on strap center placement is a workable baseline many importers use for sewn straps — confirm your own per product and price tier. Inspectors can check it with a tape measure in seconds, which is exactly why it belongs on the QC checklist: it’s one of the few fit variables that’s cheap to verify at the factory and expensive to fix after import.
How are straps attached, and what fails?
Attachment construction sets how a strap handles repeated girth tension — and it is where strap failures start. There is no universally best construction; each suits a use case, and each fails in a characteristic way. Here are the common constructions with the use case each typically suits and the failure mode to watch for.
- Single-needle straight stitch. Common on light-use schooling pads. The single stitch line is the load path, so skipped or uneven stitches at the strap ends are the failure point — check every attachment under a bright light at inspection.
- Double-needle stitch. Two parallel rows share the load; the usual specification on mid-range wholesale lines. It tolerates more girth cycles than a single row, but it still depends on even tension — loose lower-thread tension shows as looping on the pad’s underside.
- Box stitch or bar tack. A reinforced rectangle (often with an X through it) at each strap end. The common choice for premium and heavy-use lines such as riding-school pads, where pads see daily girth tension.
- Webbing-reinforced attachment. The strap is sewn through a webbing strip that spreads load across the pad body. Typically found on pads positioned for daily training use.
Strap QC checkpoints for the inspection sheet: stitch density at attachment points (no skipped stitches), webbing edges (heat-sealed or bound — raw cut edges fray in use), Velcro hook-and-loop engagement strength and alignment on keepers, and symmetry — left and right straps must mirror within tolerance, or the pad pulls unevenly. These checks sit alongside the body checks in our pre-shipment QC checklist.
What should you spec about Velcro keepers?
Keepers look trivial — short tabs of hook-and-loop — but they’re a wear item. The hook side degrades with wash cycles and picks up lint, hay, and shavings; a keeper that stops gripping is a pad that starts slipping, and the customer blames the pad. So the keeper spec matters on any machine-washable line.
Spec the keeper length and the hook-and-loop grade. Longer tabs (commonly 10–15 cm of usable wrap, a typical market observation — lock the real number per style) accommodate more billet positions; wider tabs grip better but add bulk under the flap. Ask the factory which hook-and-loop grade they use and what cycle life they rate it for, then wash-test the approved sample — keepers included — rather than accepting a generic heavy duty label as a spec. If your line is machine-washable (most schooling pads are), write the keeper’s expected wash life into the tech pack as a number, not a hope. Our saddle pad wash and care guide explains what the keeper endures in a real laundry rotation.
One practical private-label upgrade: contrast-color keepers. They cost nothing extra in most constructions, make the pad recognizable in product photos, and give your brand a visible signature on an otherwise standard schooling pad.
How do you put straps on the purchase order?
Add a strap block to the tech pack with these fields per size — this is the section factories pattern from, so it needs numbers, not adjectives.
- Strap system(s) used — girth straps, billet straps, keepers, or combination
- Strap material, width, and edge finishing (e.g., nylon webbing, specified width in cm, heat-sealed or bound edges)
- Center positions measured from the pad’s front edge and spine centerline, per size, with tolerance
- Attachment construction (single-needle / double-needle / box stitch / webbing-reinforced)
- Keeper length and hook-and-loop grade, with rated cycle life, where applicable
- Symmetry requirement: left and right straps mirror within tolerance
Include a strap-placement diagram — even a simple dimensioned sketch beats paragraphs of description. Factories pattern from drawings, not prose; our factory briefing guide covers how to structure the full tech pack. And keep a sealed reference pad from the approved bulk: strap positions drift between reorders as patterns are re-cut, and the sealed sample is the fastest way to catch drift at inspection.
What specs should you confirm when requesting a quote?
Before a factory can quote straps accurately, confirm these in writing — a quote built on assumptions about straps is where fit surprises come from.
- Strap system per style and per size — girth straps, billet straps, keepers, or combination
- Strap material, width, and edge finishing method
- Center positions from the front edge and spine centerline, per size, with your tolerance
- Attachment construction: stitch type, rows, and reinforcement
- Keeper length, hook-and-loop grade, and rated cycle life in writing
- MOQ: 50 pieces per color — our standard for the saddle pad program
- Sealed reference pad retained from the approved bulk for reorder comparison
Frequently asked questions
Do Western saddle pads need straps?
Typically no. Western pads are held by the cinch over a contoured, weighted pad body rather than by straps. If a Western-style pad includes keepers, treat them as a bonus feature, not a fit-critical spec — the contour and spine relief carry the fit.
Girth straps vs billet straps — which is better for a private label line?
Neither is universally better; they serve different saddles. Girth straps suit all-purpose and jumping lines (short billets, standard girths). Billet straps suit dressage lines (long billets thread directly through). Offering the wrong system for the discipline is a fit complaint waiting to happen — match the strap to the saddle type your customers ride in.
How many wash cycles should keepers survive?
As many as the pad is designed to survive. Write the cycle count into the tech pack — for a schooling pad, the keeper spec should match the pad’s expected wash life — and confirm the factory’s rated cycle life in writing. Then wash-test the approved sample, keepers included, before approving bulk.
What’s the most common strap defect at inspection?
In our experience, asymmetric placement — left and right straps sewn at slightly different positions — followed by skipped stitches at attachment points. Both are visible to a tape measure and a close look, which is why strap checks belong on every pre-shipment checklist even though straps are a small part of the pad.
Can straps be replaced or repaired by the end customer?
Girth strap loops can sometimes be re-sewn by a saddler, but billet straps and keepers are effectively not user-repairable — the pad is replaced. That’s another reason to spec attachment durability up front: strap failure usually means a lost customer, not a repair.
Sources & Further Reading
- Pre-Shipment Saddle Pad Quality Control Checklist — stitching, binding, and symmetry inspection method.
- How to Brief a Factory on Custom Saddle Pads — tech pack structure, artwork, and sample rounds.
- How to Wash Saddle Pads — what keepers and bindings endure in real laundry rotations.
- Saddle Pad Quilting Patterns Explained — stitch density and pattern choices buyers spec alongside straps.
- Western Saddle Pad Design Guide — how strapless pads are specced instead.
Straps are a small spec with outsized fit consequences — dimension them on the tech pack, inspect them with a tape measure, and keep a sealed reference. Our standard is MOQ 50 pieces per color, with strap positions dimensioned per size on every tech pack. Send us your pad pattern or target discipline, and we’ll quote with the strap system, attachment method, and placement spec your customers’ saddles need.
