
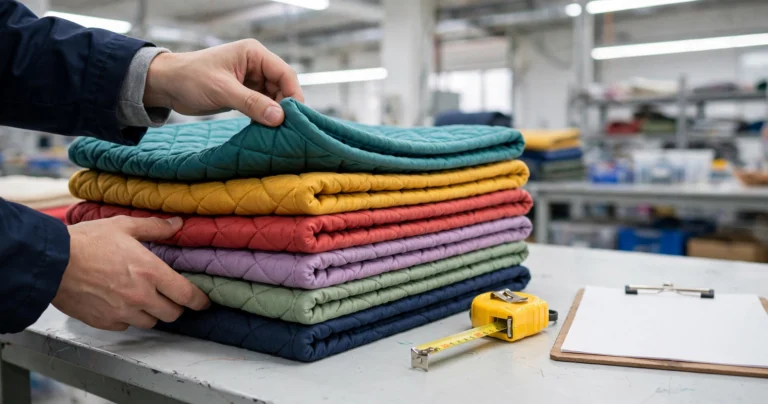
Pre-Shipment Saddle Pad Quality Control Checklist: Stitching, Binding, Symmetry
Published · Cornovo Saddlery
Consider a common scenario: a distributor opens a container of western saddle pads and finds a problem nobody checked for — the left and right sides aren’t the same length. On one style, the drop on the near side runs visibly longer than on the off side. Tack shops notice within days, and returns start coming back by the box: a textbook saddle pad quality control failure.
The factory had checked the stitching on the line but never laid finished pads flat to compare one side against the other. One missing check turned a full container into a rework job that tied up the warehouse for weeks — the kind of loss a proper saddle pad quality control routine catches in a single afternoon.
Saddle pad quality control is that straightforward at its core: a short, repeatable list of checks run on finished, packed goods before they leave the factory. This checklist covers the checks that catch the defects buyers complain about most — stitching, binding, symmetry, dimensions, hardware, and packing — plus a sampling plan you can copy into your next purchase order.
Key takeaways
- Inspect finished, packed goods — never work-in-progress — so you see exactly what your customer will receive.
- Check stitching first: skipped stitches, loose thread ends, and wavy quilting lines are the most common saddle pad defects.
- Binding decides whether a pad looks premium or cheap: it must be even, flat, and the same width all the way around the pad.
- Lay every sample pad flat and compare left against right; visible asymmetry is one of the most common reasons buyers reject a lot.
- Use an AQL sampling plan — commonly AQL 2.5 for major defects and 4.0 for minor defects — and photograph every defect you find.
What is pre-shipment QC?
Pre-shipment QC is the final inspection of finished goods, carried out after packing and before the goods leave the factory. For saddle pads, it means pulling a set number of cartons, opening a defined sample of pads, and checking each one against the approved sample and spec sheet — stitching, binding, symmetry, dimensions, straps and hardware, labeling, and carton condition — using an AQL sampling plan that both sides agreed to in advance.
How should you sample a saddle pad shipment?
Pull cartons at random from across the whole lot — different pallets, different positions — not just the cartons stacked nearest the door. Most importers use General Inspection Level II with single sampling under the ISO 2859-1 framework, which is the standard middle ground between cost and coverage. Typical sample sizes look like this:
| Lot size (pieces) | Typical sample size |
|---|---|
| Up to 500 | 50 pads |
| 501 – 1,200 | 80 pads |
| 1,201 – 3,200 | 125 pads |
| 3,201 – 10,000 | 200 pads |
These sample sizes follow the ISO 2859-1 code-letter tables for General Inspection Level II — confirm the current edition of the standard with your inspection provider, since code letters are revised periodically. Open every sampled pad fully. Checking pads still folded in their polybags hides binding waves, asymmetry, and quilting defects — and a saddle pad quality control pass that skips this step isn’t worth the inspector’s day rate. For each defect, note the carton number, take a photo, and classify it as critical, major, or minor before you decide whether the lot passes.
What stitching defects should you look for?
Stitching is where most saddle pad defects live, so it gets the most inspection time. Work across the whole pad — quilting lines, binding attachment, strap anchors — and compare stitch density and thread color against the approved sample, not against your memory of it.
- Skipped or broken stitches along quilting lines or binding. One skipped stitch in a low-stress area is minor; a run of them is major.
- Loose thread ends longer than about 1 cm, especially on the underside that touches the horse.
- Wavy or wandering quilting lines that drift off the marked grid. Sight down each line from the end of the pad — waves show up fast.
- Puckering where the top fabric gathers along the seam, usually from uneven feed or wrong thread tension.
- Missing backstitches at strap and D-ring anchor points. These take the load, so a missing lock stitch is a major defect.
- Thread color mismatch between panels, or between the sample and bulk production.
Run your hand over the quilting. Your fingers find lumps, missed fill sections, and thin spots faster than your eyes do.
How do you judge binding quality?
Binding is the first thing a retail customer touches and the clearest signal of quality on the shelf. A pad with straight stitching but sloppy binding still looks cheap. Check these points on every sampled pad:
- Width consistency: measure the binding in at least eight spots around the pad. It should be even all the way around — narrowing or widening by more than a couple of millimeters reads as sloppy.
- Flatness: the binding should lie flat, not wave, ripple, or twist. Wavy binding usually means the operator stretched it while attaching.
- Both sides caught: the binding stitch must catch the front and back of the binding everywhere. Flip the pad and check the underside — missed catches show there first.
- Corners and joins: mitered or folded corners should be neat and symmetrical; binding joins should be overlapped and stitched, never butted raw edge to raw edge.
- No raw edges: no fraying fabric peeking out from under the binding anywhere on the perimeter.
How do you check symmetry and dimensions?
This is the check that saves you from the container-of-lopsided-pads story in the intro. Lay each sampled pad perfectly flat on a table — no hanging, no folding — and measure with a tape, not by eye.
- Left vs. right: measure the drop (spine to bottom edge) on both sides at two or three points. On shaped pads, also compare the front and rear curves side to side.
- Overall dimensions: length and width against the spec sheet. Most cut-and-sew factories work to a stated tolerance on overall pad dimensions — commonly around ±1 cm, but confirm the tolerance with your factory before inspection day so there is no argument later.
- Quilting grid: on diamond-quilted pads, the diamonds should be even and the pattern should mirror across the spine. A grid that drifts off-center looks wrong the moment the pad sits on a horse.
- Strap placement: girth straps, billet straps, and keepers should sit at equal distances from the spine on both sides and match the approved sample position.
Keep the approved sample on the table next to you during inspection. Memory drifts; the sample doesn’t. When the bulk pads match the sample on stitching, binding, and symmetry, your saddle pad quality control is doing its job — and your customers get the pad they were promised. Our guide to how saddle pads are made shows which construction steps each of these checks traces back to.
What else fails on saddle pads?
Beyond stitching, binding, and symmetry, run through this shorter list on every sampled pad:
| Check | Common defect | How to check |
|---|---|---|
| Straps and keepers | Uneven length, weak stitching at anchor, wrong webbing color | Tug-test each strap; measure pairs against each other |
| Velcro / hook-and-loop | Weak grip, sewn on crooked, lint-clogged | Open and close five times; check alignment |
| D-rings and hardware | Rust spots, sharp edges, missing rings | Visual check plus a finger run over edges |
| Care and brand labels | Wrong content, misspelled text, sewn in crooked | Read every word against the approved artwork |
| Smell and stains | Chemical odor, oil spots, dye marks | Smell the polybag on opening; inspect under good light |
| Polybag and packing | Wrong bag size, missing hang tag, damp cartons | Check one full carton: count, assortment, markings |
| Carton condition | Crushed corners, wrong quantity, missing shipping marks | Weigh one carton and compare to the packing list |
How does saddle pad quality control handle a failed lot?
Write the report the same day, while the pads are still on the table. A usable saddle pad quality control report lists the PO number, lot size, sample size, the AQL levels agreed, every defect found with its classification and a photo, and a clear pass/fail verdict. Factories take photo evidence seriously; verbal complaints don’t survive the week.
If the lot fails, you have three practical options: full rework at the factory before shipment, sorting (the factory opens every carton and pulls defectives, then you re-inspect), or accepting the lot with a price reduction. Sorting sounds cheap until you price the labor — on a multi-thousand-piece lot it commonly takes a small team several days. Put your preferred remedy in the PO terms before production starts, not after the failure. For OEM programs, build these remedies into the program terms — see how OEM saddle pad programs work.
Requesting a quote: specs to confirm
When you request a wholesale quotation for saddle pads, confirm these QC-related items in writing so the inspection has a standard to hold against:
- AQL levels: agreed levels for critical, major, and minor defects (commonly zero tolerance for critical, 2.5 for major, 4.0 for minor).
- Inspection level: General Inspection Level II, single sampling, per ISO 2859-1 — or the level you prefer.
- Defect classification list: which defects count as major vs. minor for your product, agreed before production.
- Approved sample: a sealed reference sample held by both sides, used as the comparison standard on inspection day.
- Remedy terms: rework, sorting, or price reduction — and who pays for re-inspection.
Frequently asked questions
What AQL levels should I use for saddle pads?
Most buyers use AQL 2.5 for major defects and 4.0 for minor defects, with zero tolerance for critical defects such as sharp hardware or chemical smell. Tighter levels (1.5/2.5) are common for branded retail programs where the pads carry your label. Agree the levels in writing before production begins.
Should I inspect at the factory or after the goods arrive?
At the factory, before shipment — that is the whole point of pre-shipment QC. Once the container is on the water, your leverage is gone and rework means shipping goods back. If you can’t send your own inspector, hire a third-party inspection company in the factory’s region; a one-day inspection commonly costs far less than one rejected container.
What counts as a major vs. minor defect on a saddle pad?
A major defect affects function, safety, or salability: broken stitching at a strap anchor, asymmetric shape, wrong dimensions, missing hardware. A minor defect is cosmetic and unlikely to drive a return: a single loose thread end, a slightly off-center label, faint chalk marks. Define both lists in your QC checklist so the inspector isn’t guessing.
Can I skip third-party QC if the factory has its own QC team?
The factory’s QC team checks that production meets the factory’s understanding of your spec — which is useful but not the same as your check. Keep the factory’s inline QC and add your own (or third-party) pre-shipment inspection on top. The two layers catch different problems: inline QC catches process drift, pre-shipment QC catches what actually got packed.
Sources & Further Reading
- ISO 2859-1, Sampling procedures for inspection by attributes — the framework behind the sampling table above (General Inspection Level II, single sampling). Confirm the current edition with your inspection provider.
- How Saddle Pads Are Made — the construction steps each check traces back to
- Saddle Pad Sizing Guide — per-size measurement charts to check dimensions against
- How OEM Saddle Pad Programs Work — building QC terms into OEM agreements
Building a solid QC step into your saddle pad program protects your margin and your retail relationships at the same time. If you’re sourcing western pads, dressage pads, half pads, or cinches at wholesale, send your target specs and quantity for a quotation — pre-shipment QC with photo reports is part of how we work, and OEM/private-label production runs at a standard MOQ of 50 pieces per color.
